
Showing posts with label Snapchat. Show all posts
Showing posts with label Snapchat. Show all posts


1
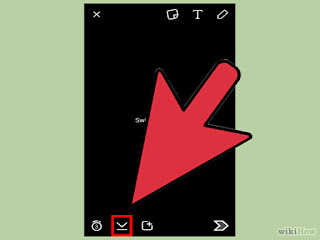
Download the image (optional). If you want to save the image before you send it out, tap the Download button at the bottom of the screen after you take the Snap. The button has a down arrow, and is next to the Timer button.
- You cannot save the image after sending out the Snap, so make sure to save it now if you want to keep it.
- After downloading the image, you can share it like you would any other image stored on your device.
2
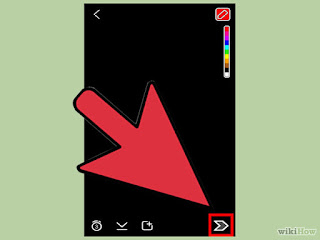
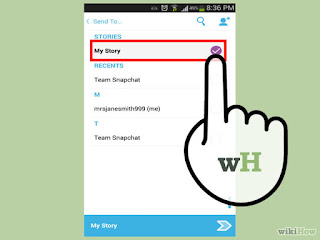
Send the Snap to someone. When you're satisfied with your Snap, it's time to send it out to your friends. Tap the arrow icon in the bottom-right corner to choose who you want to send it to. Your Snapchat contacts list will open, and you can send the Snap to as many people on the list as you'd like. Select the recipients you want and then tap the "Send" button at the bottom-right corner.
3
Add a Snap to your Story. Your Snapchat Story is a 24-hour look into your Snapchat life. Snaps that you add to your Story will be visible by your friends for 24 hours. Each Snap you add will have its own 24 hour timer, so you can keep adding Snaps to keep your Story fresh.
- To add a Snap to your Story, tap the square button with a "+" in the corner. If this is your first time adding a Snap to your Story, you'll be asked to confirm. Your Story is viewable by everyone you have added as a friend.
4
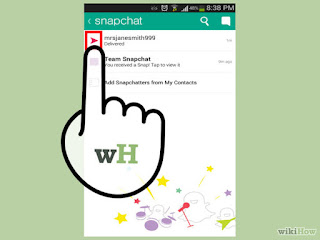
Check the status of the Snaps you've sent. Snapchat will inform you when your Snaps have been viewed, replayed, or screenshot. Swipe to the right on the main Snapchat screen to open your message history. The different icons next to the recipient's name will indicate the status of your latest Snap.

- Triangles represent sent Snaps, while squares represent received Snaps.
- Red icons are Snaps without audio, while purple icons are Snaps without
- A solid icon has not been viewed yet, while an outline indicates that the recipient has viewed the Snap.
- Two opposing triangles indicate that a screenshot was taken of your Snap.
- A circular icon with an arrow indicates that your Snap was replayed.
You can install in google play
1
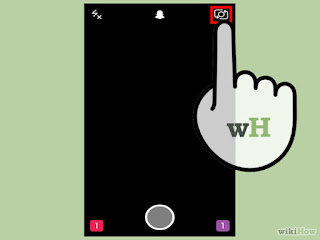
Line up your shot. The Snapchat main interface automatically activates your phone's camera, allowing you to quickly line up shots. Tapping anywhere on the screen will adjust the focus of the camera, while tapping the camera icon in the upper-right corner will switch to the front camera (or back to the rear camera).
2
Try out some Lenses (newer devices only). If you have a recent device, you can try out the Lenses feature by pressing and holding your face while in Selfie mode. After a moment, you'll see a wireframe over your face, and then the Lens options will appear at the bottom of the screen. You can swipe through them to see the different available effects. Some Lenses will have additional commands, such as "Open your mouth."
- Lenses requires Android 5.0 (Lollipop) or later or an iPhone 5 or newer. Lenses may not available on all Android devices, even if your device is running 5.0 or later.
- The selection of Lenses rotates on a regular basis, so you may not be able to find the exact effect you're looking for. Check back in the next day or two to see if it has shown up.
3
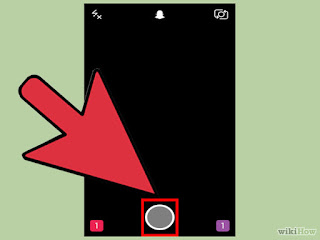
Take the picture or record a quick video. Once you're lined up your shot and selected a Lens (if desired), you can take your Snap. Tap the circle at the bottom of the screen to take a photo. Tap and hold the circle to record a video. The video can be up to ten seconds long.
4
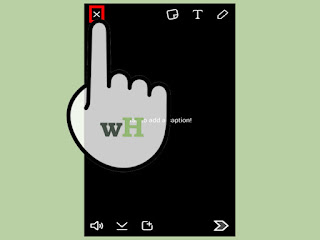
Discard the Snap and try again if you don't like it. Tap the "X" in the upper-left corner after taking the Snap if you don't like how it turned out. This will discard the Snap without sending it.
5
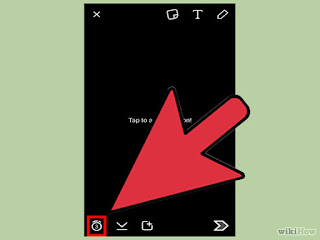
Tap the timer to set the time limit. One of the unique features of Snapchat is the time limit attached to each Snap. The recipient will only be able to view the Snap for the allotted time, up to ten seconds. The default time is three seconds. Tap the stopwatch icon in the bottom-left corner to set the time limit.
6
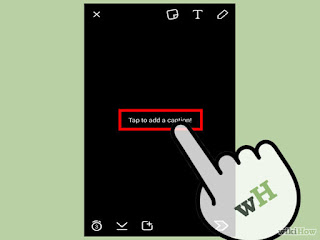
Tap the Snap to enter a caption. Tap the Snap to add a custom caption to the image. The recipients will be able to see the caption along with the photo or video when they open the Snap.
7
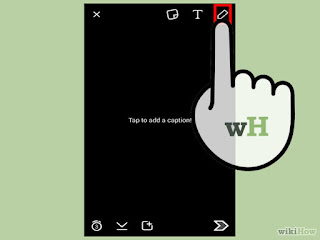
Tap the Pencil to draw on the Snap. Tap the Pencil icon in the upper-right corner to open the drawing tools. You can use your finger to draw on the Snap, and the slider on the right side of the screen allows you to change colors. You can draw on photo and video Snaps.
8
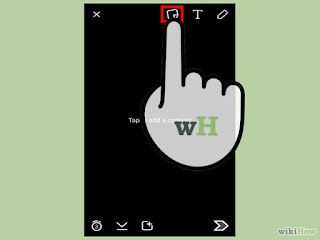
Tap the Sticker button to add stickers. A menu will appear, allowing you to select stickers to add to your Snap. Swiping left and right on the menu will display more stickers. Tap a sticker to add it to your Snap. You can tap and drag a sticker you've placed to move it around.
9
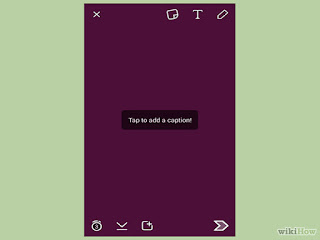
Swipe your image or video to add filters. Swiping to the left or right will cycle through the available filters. Some filters may require location access to work. You can add filters to images or videos.
You can install in Google Play

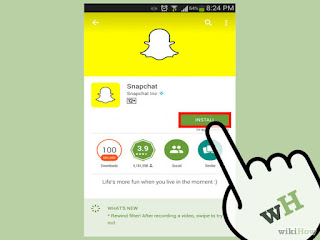
1
Download and install the app. You'll need the Snapchat app to create an account and use the service. You can't create a Snapchat account from a computer. You can download the Snapchat app for free from the Google Play Store and the Apple App Store. Snapchat accounts are free.
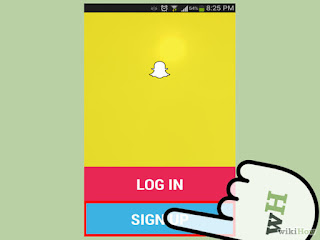
2
Tap "Sign Up" after launching the app. This will take you through the account creation process.
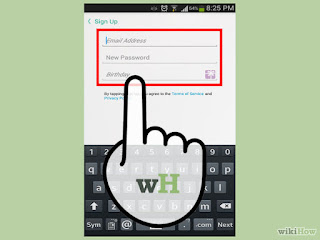
3
Enter your account details. You'll be prompted to enter your email address, birthday, and to create a password. Make sure the email address is valid, as you'll need it if you ever want to reset your password. You'll also need to be at least 13 years old to create your account.
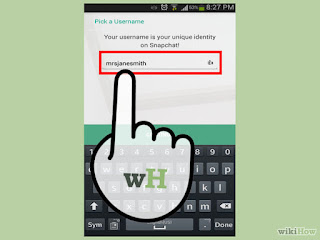
4
Create a username. You'll need to create a unique username that will be displayed to other Snapchat users. Make sure that it doesn't contain any personal information. You won't be able to change this username later, so make sure you like the name.
- If you want to change your username later, you'll need to create a new account.
5
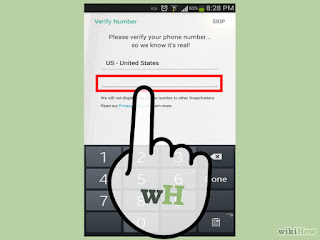
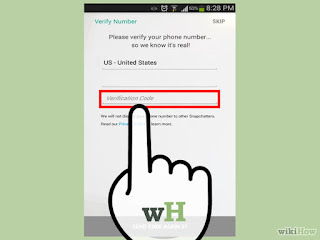
Verify your number (optional). Snapchat will prompt you to verify your phone number via SMS. Verifying your number allows you to reset your password via text, but is not necessary to create an account.
6
Prove that you're human. Snapchat will require you to select the correct images before your account is created. This is to prevent bots from creating accounts automatically. Tap "Continue" after selecting the images with the Snapchat ghost on them.
7
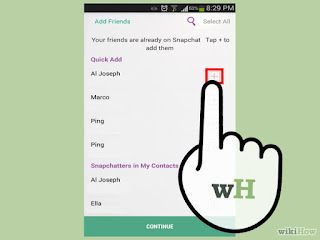
Add friends from your phone's contact list (optional). Snapchat will scan your phone's address book to look for other people who are using Snapchat. You can skip this if you'd like by tapping "Continue" and then "Not Allow."
You can install in Google Play
Snapchat is a picture-based chatting app that has taken the world by storm. If you want to get in on the fun, getting started only takes a few minutes. Once you're signed up for an account, you'll be able to start sending photo and video Snaps immediately. You'll also be able to video chat with your Snapchat friends. Remember, Snaps are gone once they're viewed!
1
Make sure that Snapchat is up to date. To get access to the most filters, you'll need the newer versions of Snapchat. If you haven't updated in a while, updating may give you more filter options. You can update the app through the Google Play Store or the iPhone App Store.
- See How to Upgrade Snapchat for details on updating your Snapchat app.

2
Enable Location Services for Snapchat. Some filters require access to your location to work, such as the city or temperature filters.
- iOS - Open the Settings app. Tap "Privacy" and then "Location Services". Toggle "Location Services" on if it isn't. Find Snapchat in the list and toggle it on.
- Android - Open the Settings app. Select "Location" and then toggle "Location" on at the top of the menu.

3
Take a picture. Return to the main Camera screen. Touch the large white circle to take a picture.

4
Add a filter to the photo. Swipe the photo right or left to add different filters. Not all filters are available if Location Services are not enabled. If you swipe from right to left, the filters in order are:
- The Sepia filter will give your photo a yellowish tint.
- The Vintage filter will make your photo look older than it is.
- The Black and white filter makes the photo black and white.
- The Speed filter adds the speed you were moving when you took the picture. If you weren't moving, it will be 0 KM/H or 0 MPH.
- The Temperature adds the temperature at your location.
- The Time filter adds the time you took the photo.
- The City filter displays your current location as a fun sticker.

5
Add more than one filter. To add more than one filter, swipe to a filter you like. Press and hold the photo with one finger and then swipe with the other. You can use two filters total.
- This lets you add the time, temperature, or speed on top of the other filters, such as sepia and vintage.

6
Enable filters if you don't see all of them. You may have disabled filters if you turned off location services for Snapchat. You can turn them back on in Snapchat's Settings menu.
- Tap the Ghost button on the main Snapchat screen and then tap the Gear button to open the Settings menu.
- Tap "Manage" and then toggle Filters on.
How to Get Effects on Snapchat


1
Understand the limitations. Lenses do not work with the majority of Android smartphones, and only with recent iPhones. If you don't have a new device, there's a good chance that you won't be able to get Lenses to work.
- The iPhone 4, 4S, and iPad 2 are not supported.
- Lenses requires Android 5.0 (Lollipop) or later for Android devices. Even with 5.0+ and recent devices, some users report that the feature still will not work.
2
Update Snapchat. Snapchat released it's newest feature called "Lenses" on September 15, 2015. You'll need to make sure that you're running the latest version of Snapchat to access Lenses. You can update Snapchat from the App Store or Google Play Store.
- See How to Upgrade Snapchat for details on updating your Snapchat app.
3
Switch Snapchat to Selfie mode. Lenses works by recognizing your face and then morphing it with effects. To use it, you'll need to be using Snapchat in Selfie mode with the forward-facing camera.
4
Hold your phone away so you can see your entire face. Lenses works best when you can see your entire face in the frame.
5
Press and hold on your face. After a moment, your face will be scanned and the Lens options will appear at the bottom of your screen.
- Make sure that your entire face is in the screen, and that you're holding the camera still. You may have to press and hold for several seconds or try a few times until the feature turns on.
6
Select the Lens that you want to use. Swipe left and right to select from the Lenses available. Snapchat rotates the Lens selection on a daily basis, so there are always new choices.
- Some of the popular Lenses that you'll likely encounter include puking rainbows, screaming, zombie, "in love," and crying.
- Because of the rotating selection, the Lens you are looking for may not be available. Check back in the next day or two to see if it has become available again.
7
Follow the instructions for the Lens you chose. Many Lenses will display a quick command to make the effect happen. For example, to do the puking rainbow you're prompted to open your mouth.
8
Take or record a Snap. Once you're ready, you can tap the Capture button to take a Snap, or press and hold it to record a video. Your Lens effect will be recorded in the Snap.
- Android devices must be running 5.0 or later to record video Snaps with Lens effects.
9
Send your Snap. Once you've captured your Snap, you can send it to your Snapchat contacts like you would any other Snap.
RESOURCE BY WIKIHOW