
1
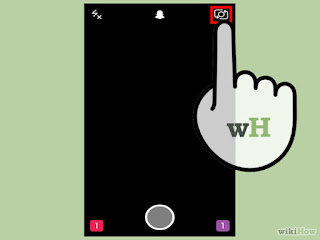
Line up your shot. The Snapchat main interface automatically activates your phone's camera, allowing you to quickly line up shots. Tapping anywhere on the screen will adjust the focus of the camera, while tapping the camera icon in the upper-right corner will switch to the front camera (or back to the rear camera).
2
Try out some Lenses (newer devices only). If you have a recent device, you can try out the Lenses feature by pressing and holding your face while in Selfie mode. After a moment, you'll see a wireframe over your face, and then the Lens options will appear at the bottom of the screen. You can swipe through them to see the different available effects. Some Lenses will have additional commands, such as "Open your mouth."

- Lenses requires Android 5.0 (Lollipop) or later or an iPhone 5 or newer. Lenses may not available on all Android devices, even if your device is running 5.0 or later.
- The selection of Lenses rotates on a regular basis, so you may not be able to find the exact effect you're looking for. Check back in the next day or two to see if it has shown up.
3
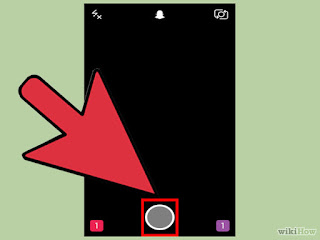
Take the picture or record a quick video. Once you're lined up your shot and selected a Lens (if desired), you can take your Snap. Tap the circle at the bottom of the screen to take a photo. Tap and hold the circle to record a video. The video can be up to ten seconds long.
4
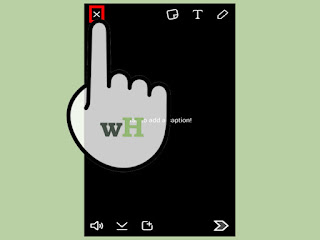
Discard the Snap and try again if you don't like it. Tap the "X" in the upper-left corner after taking the Snap if you don't like how it turned out. This will discard the Snap without sending it.
5
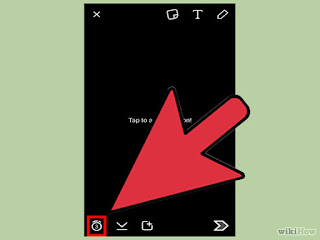
Tap the timer to set the time limit. One of the unique features of Snapchat is the time limit attached to each Snap. The recipient will only be able to view the Snap for the allotted time, up to ten seconds. The default time is three seconds. Tap the stopwatch icon in the bottom-left corner to set the time limit.
6
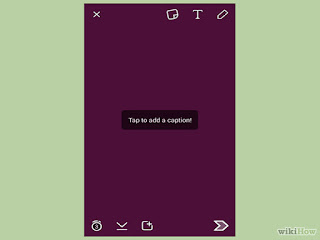
Tap the Snap to enter a caption. Tap the Snap to add a custom caption to the image. The recipients will be able to see the caption along with the photo or video when they open the Snap.
7
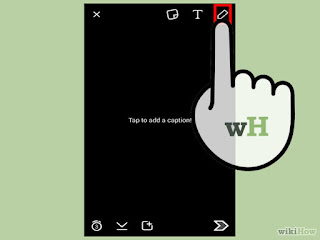
Tap the Pencil to draw on the Snap. Tap the Pencil icon in the upper-right corner to open the drawing tools. You can use your finger to draw on the Snap, and the slider on the right side of the screen allows you to change colors. You can draw on photo and video Snaps.
8
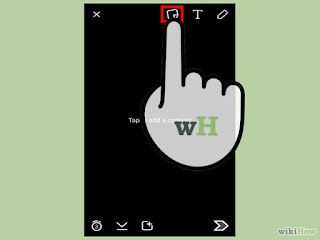
Tap the Sticker button to add stickers. A menu will appear, allowing you to select stickers to add to your Snap. Swiping left and right on the menu will display more stickers. Tap a sticker to add it to your Snap. You can tap and drag a sticker you've placed to move it around.
9
Swipe your image or video to add filters. Swiping to the left or right will cycle through the available filters. Some filters may require location access to work. You can add filters to images or videos.
You can install in Google Play

